Scanning documents
Prerequisites
To scan the document, you'll need the following elements:
1. The scan canvas that you have been given (black sheet with color references and a ruler).
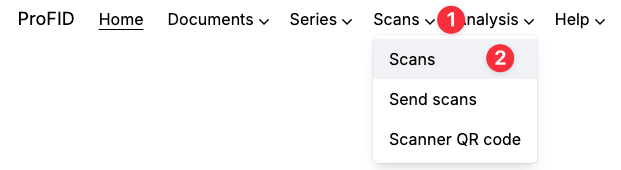
2. The QR code related to the scanner: in ProFID, go to the "Scans" top menu and click "Scanner QR code". Then fill in the fields depending on the scanner you intend to use and then click on "Create QR code". Print the generated code and cut it out. The piece of paper can be stuck on the scan canvas if you intend to use it exclusively with this particular printer.
This code is only valid for this scanner. You will have to print another QR code if you use a different scanner.
3. The QR code related to the document page: this code has been printed while adding the document (see Document QR codes). The code can be re-printed if needed (see reprinting document QR codes).
The number of required QR codes depends on the document category. For example, a passport only needs one scan which contains both the personal data page and its opposite page. Therefore, only the "RECTO" QR code is needed. On the other hand, an identity card in the "credit card" format will require two scans with two different QR codes, "RECTO" and "VERSO".
4. The document itself.
Do not add an extra ruler, as this will prevent the system from extracting the document. Size is measured using the ruler integrated in the scan canvas.
Reprinting document QR codes
In a normal workflow, the QR codes are printed when the documents are created.
However, if you haven't done so or if you need to reprint the QR codes, you can do so by going to the document's page and clicking the "Print the QR codes" button from the top dropdown menu.

Then, follow the instructions as shown in the document QR codes section.
Scanning a document
1. Place the document, the QR code related to the scanner, and the QR code of the document (corresponding to the page to scan) on the surface of the scanner. Then place the canvas on top of it, making sure that each element can be seen, that they do not touch each other and that they do not overlap (they should not overlap each other, not touch each other and not touch the borders of the canvas). Close scanner's lid.

In order to simplify the positioning of the different elements and to prevent them from moving too much while closing the scanner, it is recommended to use double-sided tape (stick it to the black sheet) and/or to use the following method:
- Place the two QR codes on the scanning platform
- Place the document in the bottom half section.
- Place the upper-side of the scan canvas against the edge of the scanner (i.e. just above the QR codes). Then press gently on the top to position it on the QR codes with one hand (1) and gently lift it down with the other hand (2) while keeping pressure on the QR codes.
- The canvas is now completely laid out on the different elements. Do not take off the hand (1) positioned on the QR codes. With the other hand (2), you can rectify the positioning of the document by slightly lifting a lower corner of the scan canvas.
- Gently lift (2) the scanner's lid down (especially if it is a booklet type document) until it touches the back of hand (1), hand that you will then remove gently while finishing to close the lid.
The system can cope with any document orientation, so you don't need to perfectly align the document with the canvas.
2. Open the scanning interface:
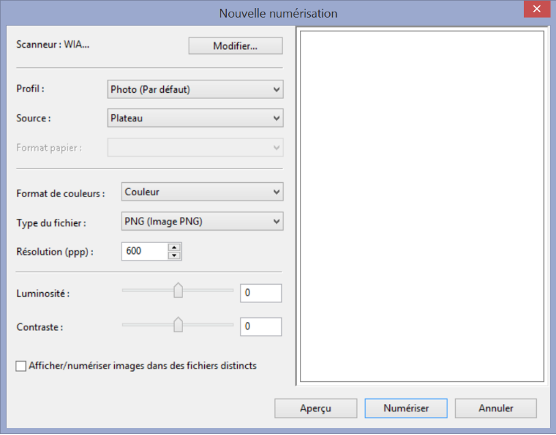
Windows users: Select Start > Settings > Devices > Printers & scanners. Then double-click on the scanner used > scan pictures or documents. Choose the .png format and a resolution of 600 dpi. Uncheck the checkbox "Display/scan images in distinct files" if it is checked by default.
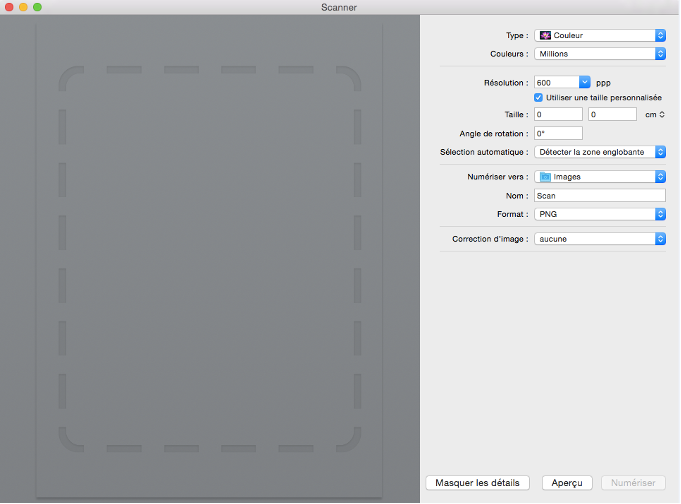
Mac users: open the "System preferences" by clicking on the icon in the Dock or by choosing "Apple menu" (top left corner) > "System preferences". Once in the system preferences, choose "Printers and scanners", select the scanner > "Display details". Choose the .png format and a resolution of 600 dpi. In the "Automatic selection" field, use the dropdown list to select "Detect the enclosing zone".
3. While scanning, firmly push on the top of the scanner to make sure that all the elements are in contact with the bottom part of the scanner. This is particularly important while scanning a booklet type document (e.g. passport). This prevents some blur (depth of focus). Try avoiding moving the weight while the scan occurs, this could lead to distortion in the image.
4. Import the image and give it a file name (for example: "Number of the document_recto"). With Mac, the name is given before the scan.
5. You should get an image similar to the following one:
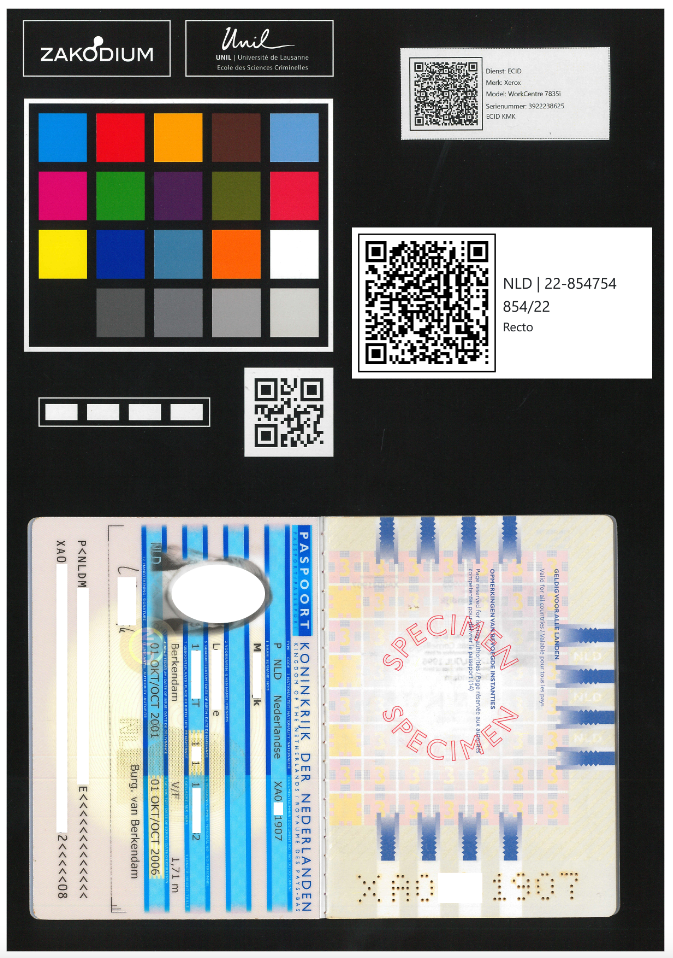
6. Verify that each element of the page is sharp and that there is no distortion. If needed, repeat the scanning operation.
Verify that the different elements do not touch the borders of the canvas and that nothing overlaps. If not, the system will not be able to automatically extract the images and associate it with the document.
Sending a scanned document
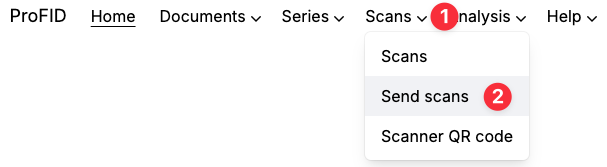
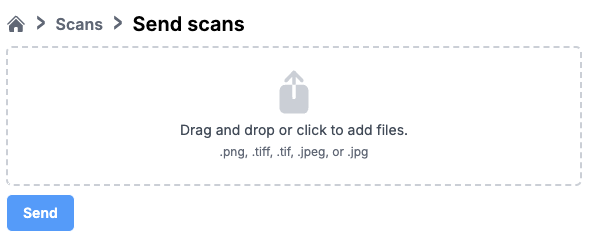
In the menu, click on "Scans" and then "Send scans".
As indicated, drag the images from a folder (drag & drop) or click in the framework to add manually the images. Finally, click on "Send".
This operation can take between a few seconds and a few minutes depending of the number of images that need to be sent. A notification appears when the transfer is finished. Without this notification, it is necessary to consider that the image(s) has (have) not been sent correctly. If the notification does not come, repeat the operation.
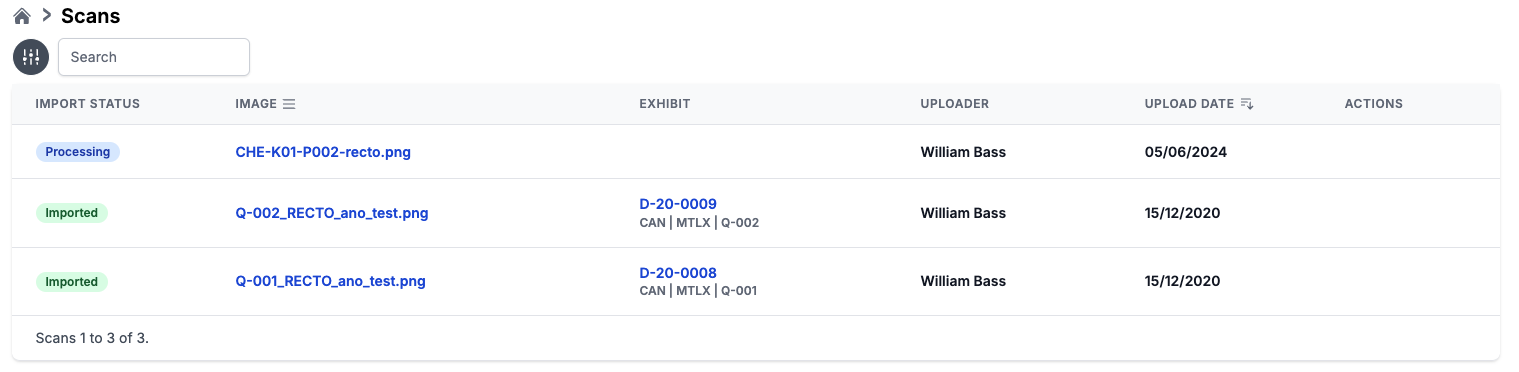
Once the upload is complete your scans will be processed by ProFID. You can check the status of your scans by going to the "Scans" and click "Scans list". The scans' statuses are updated automatically and you don't need to refresh the page.
Operations for adding a document (creation and description of the document) and sending images are independent. You can add several documents in a row without adding the images as you go along, then scan the different documents and finally add all the images scanned. You can also send several images at the same time to ProFID. The system will automatically associate the images with the right document by reading the QR codes. This makes the treatment of many documents easier.
After initial treatment (which should not take more than a few minutes), the scans are ready to be reviewed and anonymized.